- HOME
- iPhone Generations
- iOS
- iOS 8 Best Features
- Siri
- iOS Music
- iPhone News
- iPhone Specs
- iPhone SMS
- iPhone Applications
- iPhone Video
- AirPlay
- iPhone TV
- iPhone Network
- iPhone GPS
- iPhone Ringtones
- iPhone Tips
- iPhone Sys Tricks
- iPhone Emulators
- iPhone Hacks
- iPhone Customization
- iPhone Accessories
- Cheap Calls
- Buy iPhone
- Arabic iPhone
- Hot Topics
- Privacy Policy
- Site Search

iPhone NES EmulatorAn iPhone NES emulator is one of the most popular Nintendo emulators on the iPhone. It allows you to run NES (Nintendo Entertainment System) games on your iPhone at full speed, and with the use of a Wii Remote to control the games.
First you have to jailbreak iPhone in order to install the iPhone NES emulator. Once you jailbreak, you can then install the NES emulator from Cydia which will be available upon jailbreaking. Setting up an iPhone NES emulator:First you need to install the iPhone NES emulator. There are two Nintendo nes emulators available in Cydia for the iPhone. One is called NES which used to be free, and then it became $5.99 when updated to support iPhone OS3.0. The other iPhone nes emulator is called nes4iphone and also costs $4.99 from Cydia.
Just do a search for NES or NES4 in Cydia and the two iPhone NES emulators will show up. Once installed, a new directory called ROMs will be created inside var/mobile/Media/ROMs/NES of the iPhone file system. You can simply connect PC to iPhone and access the file system of the iPhone. Then, you can drag and drop files from your Mac or PC to anywhere in the file system on your iPhone. Visit the PC to iPhone page to learn about available connection methods. Drag files with (.nes) extension to the ROMs directory of the iPhone. You can find many of those rom files on the internet or you can download then directly to your iPhone using the built in browsers of the Nintendo nes emulator apps. One problem with those NES iPhone emulator is the controls. Because those old games are designed to be controlled with a standard game controller, the touch screen make the games less enjoyable. One solution is to buy an iPhone game controller that is designed for those classic games. Visit the iPhone game controller page to learn more. Or use a Wii Remote which is supported with nes4iphone app. Both iPhone NES emulators on Cydia provide good game play and run at full speed. The biggest difference between the two packages is the Wii Remote support of nes4iphone. If you want to be able to control your games with a wii remote, then nes4iphone is the one. Other than that they both have the same performance. nes4iphone:
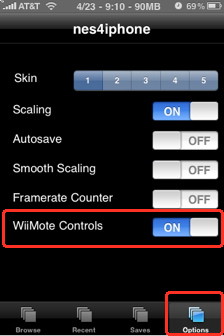
The ability to connect a wii remote and control NES games with the wii remote is amazing advantage. You need the following to get the wiiMote to work with nes4iphone: 1- Turn off bluetooth on the iPhone 2- install BTStack from Cydia. 3- Install SpringBoardAccess from Cydia 4- In nes4iphone options, turn WiiMote control button on as shown on the picture on the right.
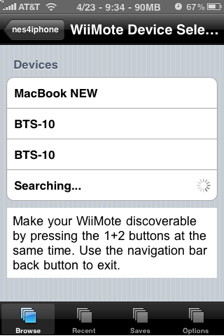
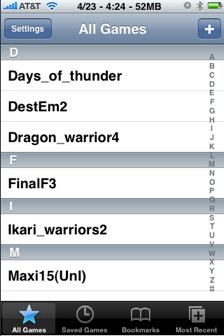
Once you have doe those 4 steps, then start ness4iphone. You will get a menu asking you to make the Wii Remote discoverable by pressing buttons 1 + 2 together on the wii remote. Then nes4iphone will find the wii remote. A list of all available games on your device will be displayed.
Choose the preferred setting. On iPhone 3GS, the portrait & sound option works very good.
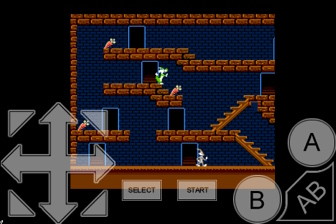
While if you run a game without the WiiMote support, the control buttons will show up as transparent in the background of the NES game as shown below.
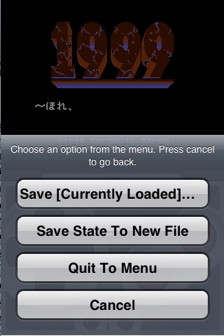
In portrait mode, the display and controls look a little different. You can save the state of any game and come back later to exactly where you left off.
It is so much fun playing an NES game on the TV and controlling the game wirelessly with the Wii Remote. To connect the iPhone to a TV and display its screen visit the iPhone video out page to learn how .
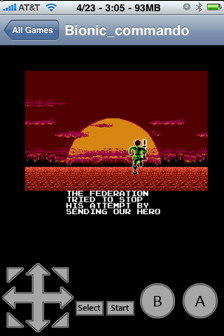
NES:NES 3 is another Nintendo NES emulator for the iPhone. It does everything identical to nes4iphone except for the wii remote support, it doesn't have that. The game play quality is good and the graphics and music speed are the same as the original Nintendo NES.
You can also save the game state and come back to where ever you left off.
You can simply rotate your iPhone to landscape or portrait to change the screen orientation. When in portrait mode you have access to the app options and can also change the game rom to another one. Tap the + button at the right corner to add a rom website. If you know a website with rom files for Nintendo NES, then enter it here, and you should be able to download those Nintendo NES rom files directly to your iPhone. With this method, you won't need to copy roms manually by connecting your PC to iPhone.
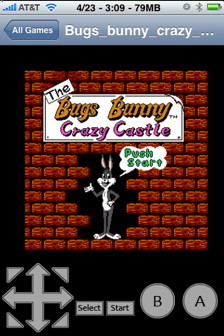
This is the portrait mode of NES emulator for iPhone.
Return from iPhone NES Emulator to iPhone Emulator Return to Home of iPhone Tips and Advice
blog comments powered by Disqus
|
 The
The
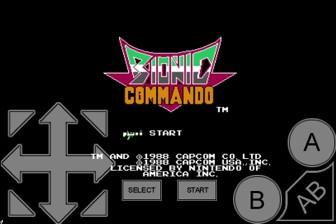
 nes4iphone is the best Nintendo nes emulator for iPhone. The game play is smooth and fast just as a regular NES console.
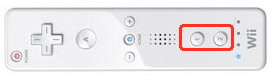
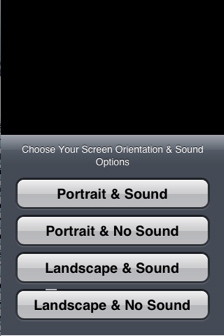 With nes4iphone you can choose the orientation of the game if portrait or landscape, and if you want sound or not.
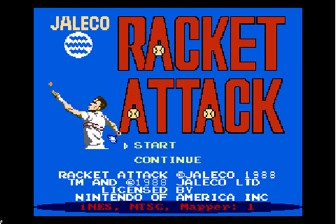

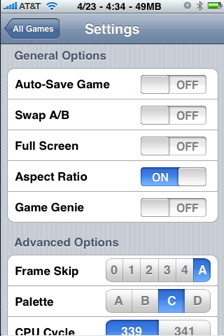 The emulator has many settings, but there is nothing special that you would want to play with. Be careful when you change parameters here, the game might stop working.
 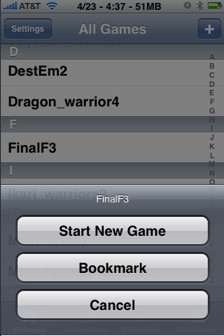 The NES3 emulator has some small differences to nes4iphone. You don't choose the game orientation when you start the game as nes4iphone does.
 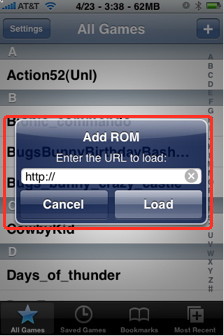 This iPhone NES emulator allows you to download rom files directly form the internet to your iPhone.